Compressing videos in .mp4 format for Team Share
This tutorial will demonstrate the simple steps for exporting a compressed .mp4 version of your project using Final Cut Pro X.
Step 1
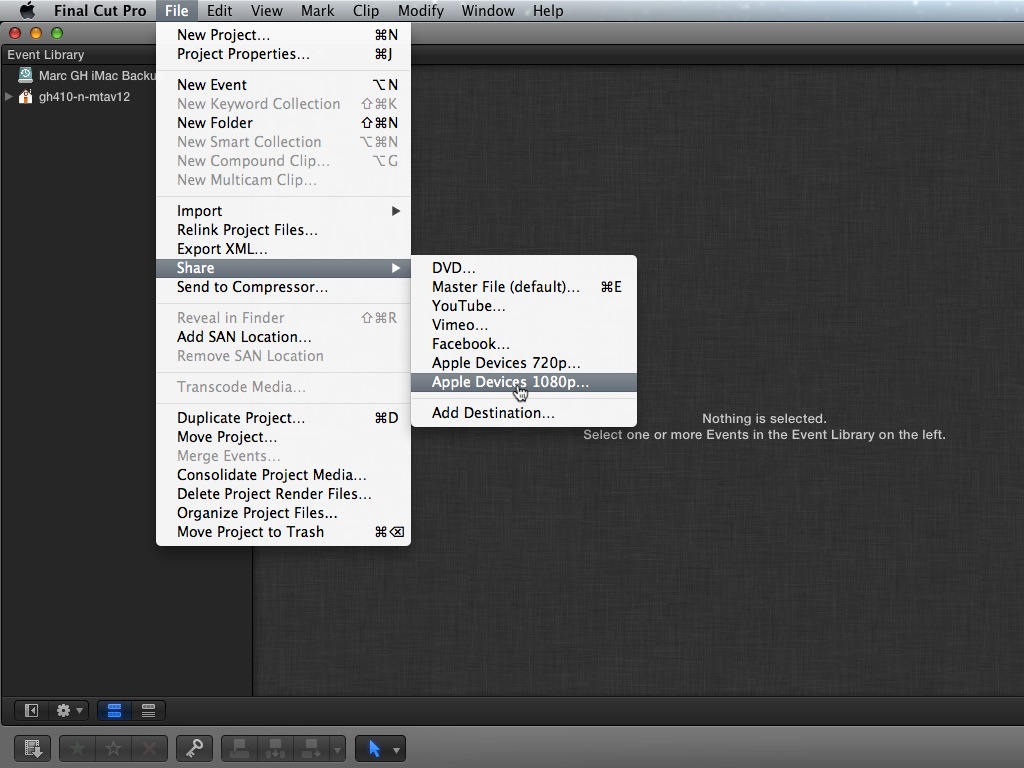
Select the project you would like to export from your project library.
Step 3
A window will appear with several options. Under the Info tab, please title your project, provide a proper description, enter your name, and add any relevant tags.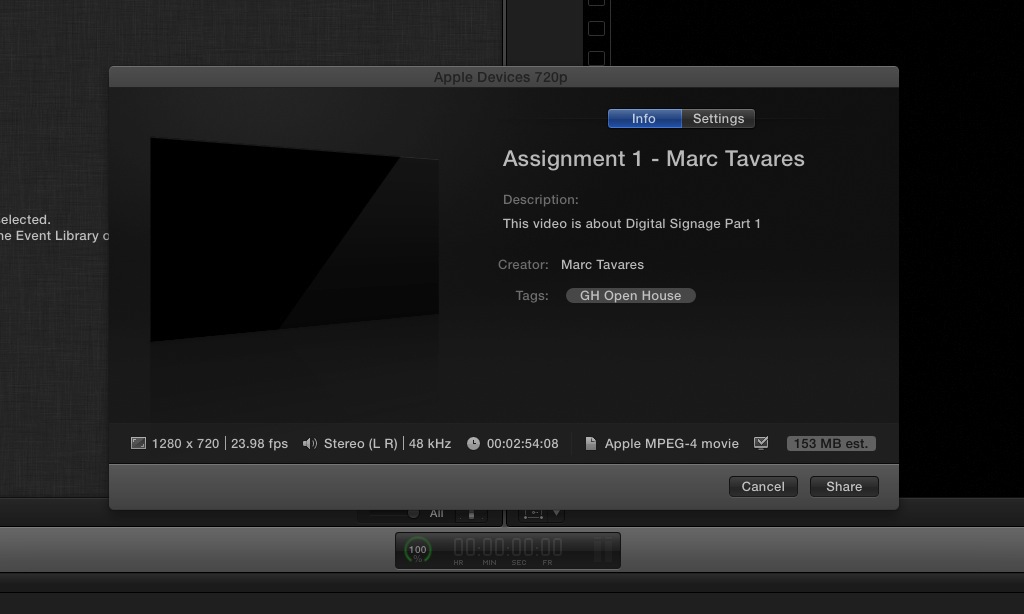
Step 4
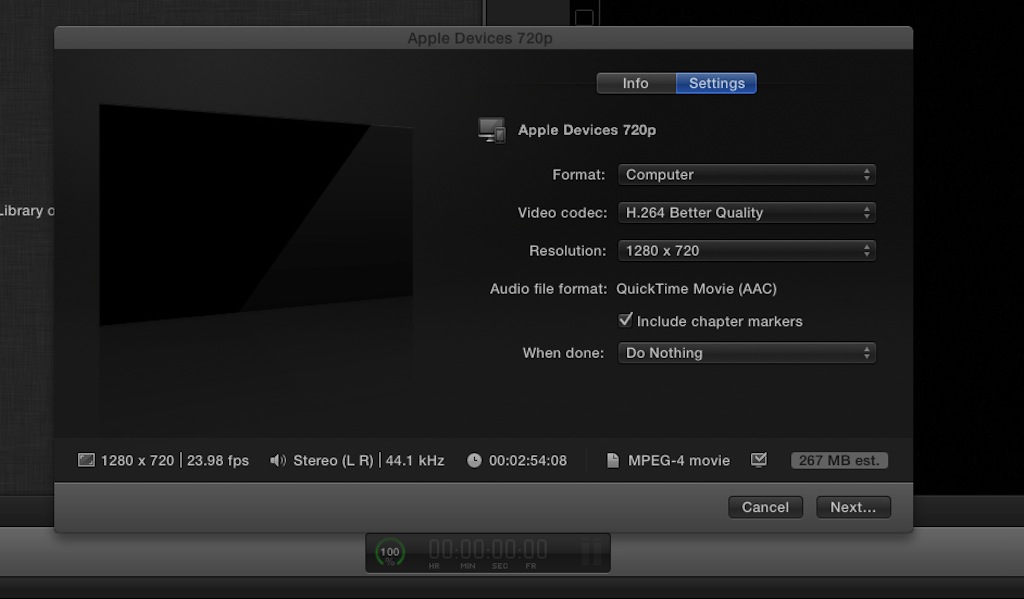
Select the Settings tab. Change the settings as seen in the image below. When you’re finished changing the settings, click Next.
Step 5
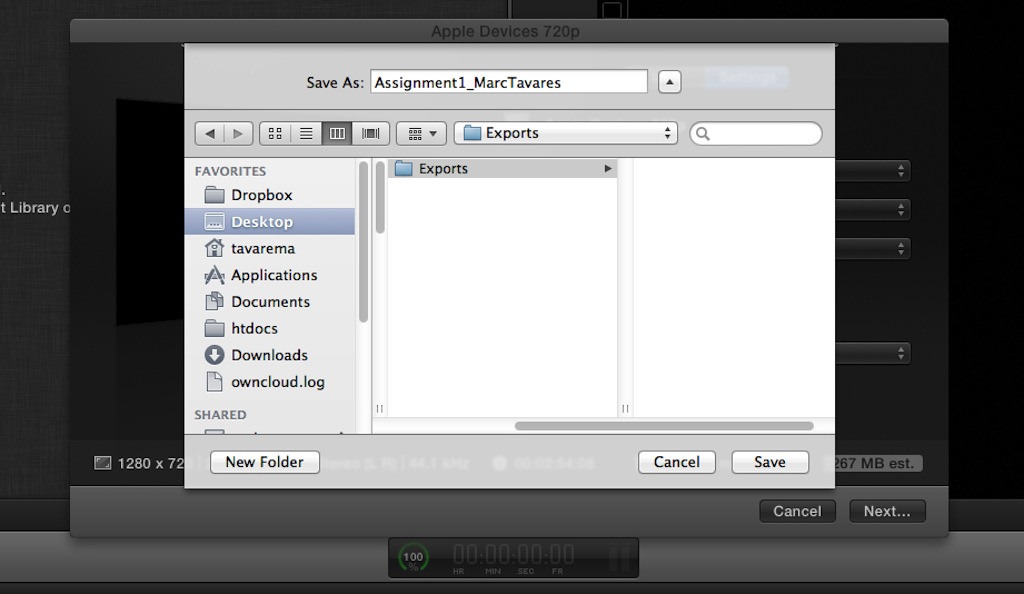
Name your project based on the naming conventions specified by your Instructor and choose a destination to Save to. Click Save.
Step 6
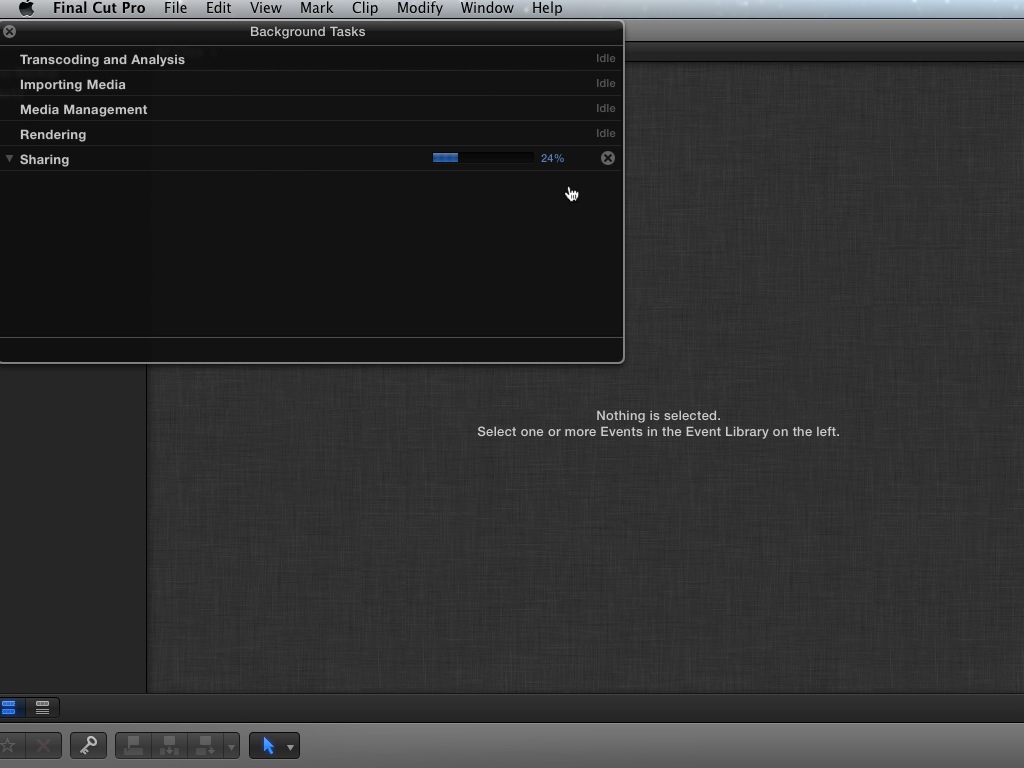
Your video has now started compressing. You can see the progress in the timecode display bar.

Step 7
To see your compression status in more detail, click on the progress status in the timecode display bar to bring up the Background Tasks Window.
