How to Print up to 16″x20″ photos in the Print Lab
This tutorial will show you how to print 16″x20″ prints using the Canon IPF5100 photo printers in GH317.
Step 2
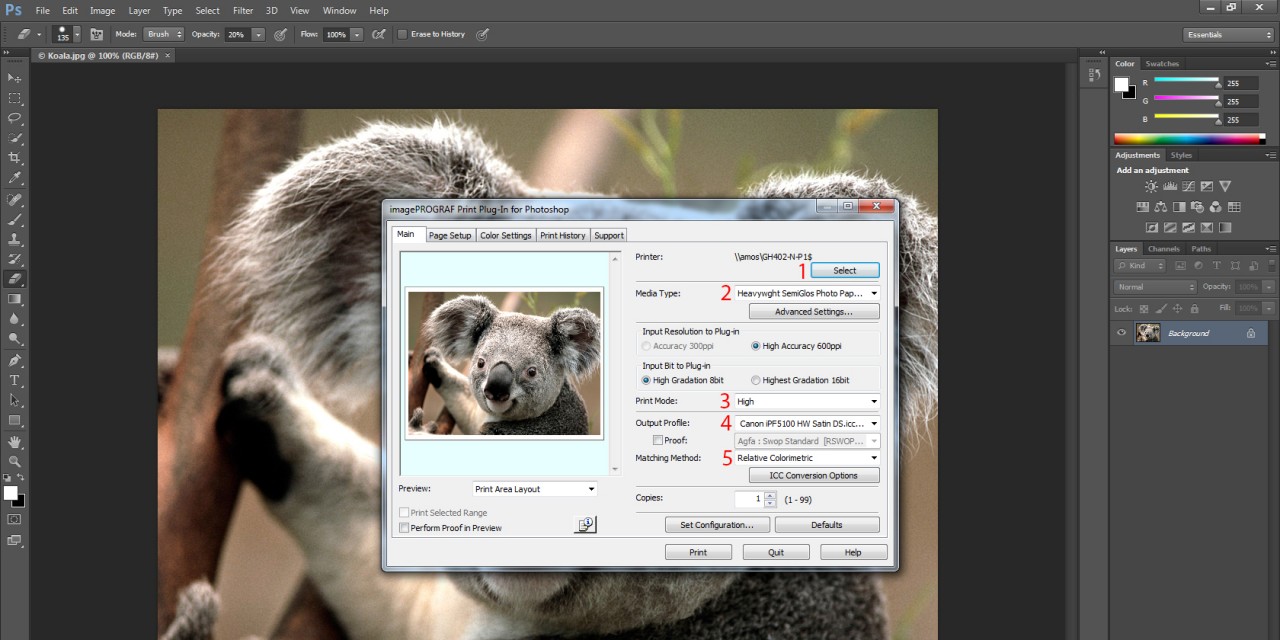
From top to bottom in the Main tab:
- Choose GH402-N-P1$ as the destination printer by hitting Select.
- Choose Heavywght SemiGlos Photo Paper 2 as the Media Type in the first drop-down menu.
- Choose High as the Print Mode in the second drop-down menu.
- Choose Canon iPF5100Roll20131001.icc as the Output Profile in the third drop-down menu.
- Choose Relative Colormetric as the Matching Method.
Step 3
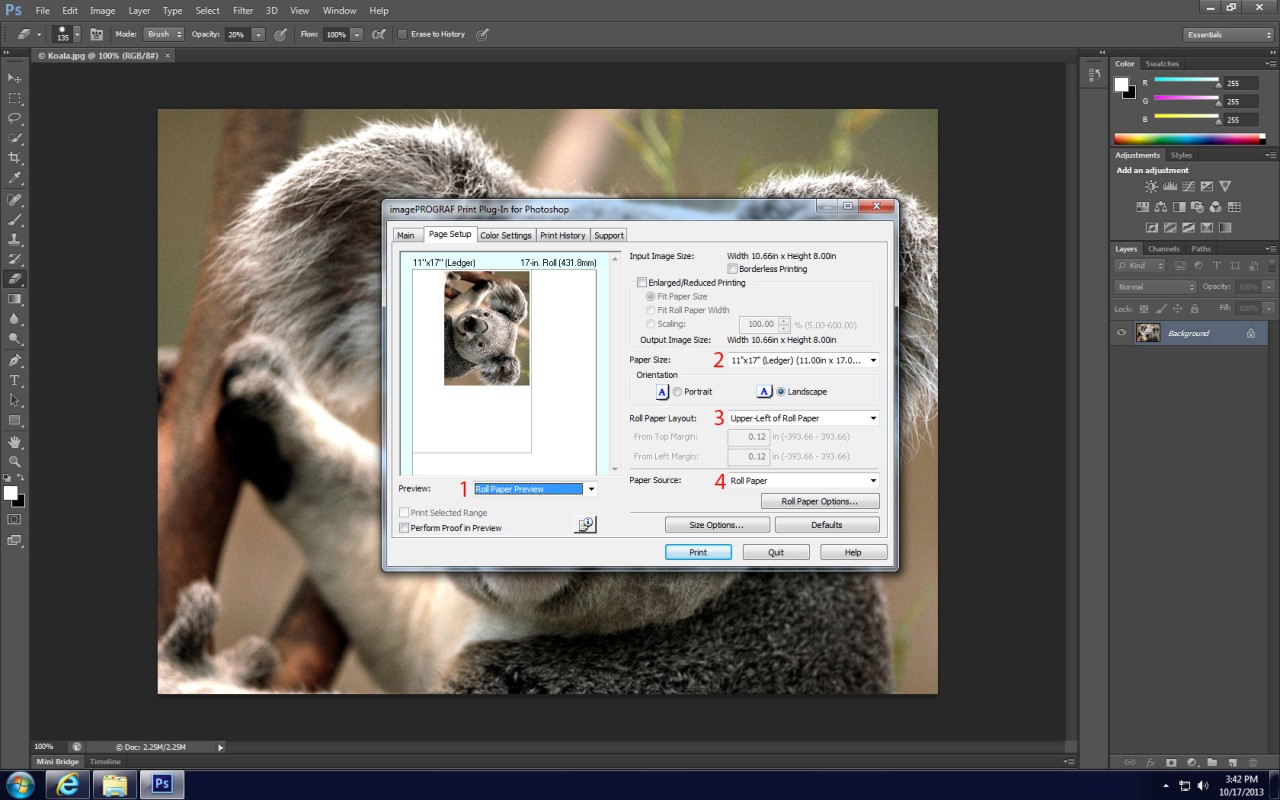
From top to bottom in the Page Setup tab:
- Choose Roll Paper Preview so that you can see where your print will be on the paper roll.
- Choose your Media Size from the drop-down menu. Allowable sizes are 11×17, 13×19 and 16×20.
- Choose Upper Left of Roll Paper as the Layout.
- Choose Roll Paper as the Media Source. If you do not select this, your print will not come out.
REMEMBER: If you change your mind and decide not to print this image, please go to the print release station and delete the file from the print queue.


